![]()
Creating & Placing the Facebook Pixel
To create your Facebook Pixel, navigate to Pixels under the navigation dropdown at the top of the Ads Manager screen - as shown ablove. If you haven’t yet created a Pixel, you’ll see a prompt to create one; if you’ve previously created one, you can access the code by going to Actions > View Pixel Code.
![]()
Once you walk through the process of creating or viewing the pixel, you’ll see a snippet of code to copy and paste. Don’t worry, you don’t need to possess any coding skills to add this to most sites! You can either send this off to a web developer or add it yourself. If you’re adding the code yourself, Google Tag Manager provides a simple solution for placement.
If you’re not familiar with Google Tag Manager (GTM), this tool allows you to place a single code on your site from which to deploy multiple tracking codes. Tag Manager greatly simplifies the process of setting up tracking for analytics and various ad platforms, reducing required back-and-forth with web developers or coding proficiency. If you are using Wordpress, there are many available plugins for installing GTM. See these article on our blog for some more information about setting up and configuring Google Tag Manager.
Within your website’s Google Tag Manager workspace, select “Tags” and choose “New” to begin creating your Facebook tag. Give your tag a descriptive name (we used “FB Pixel”).
Next, choose a tag type of Custom HTML and paste your pixel code into the box provided.
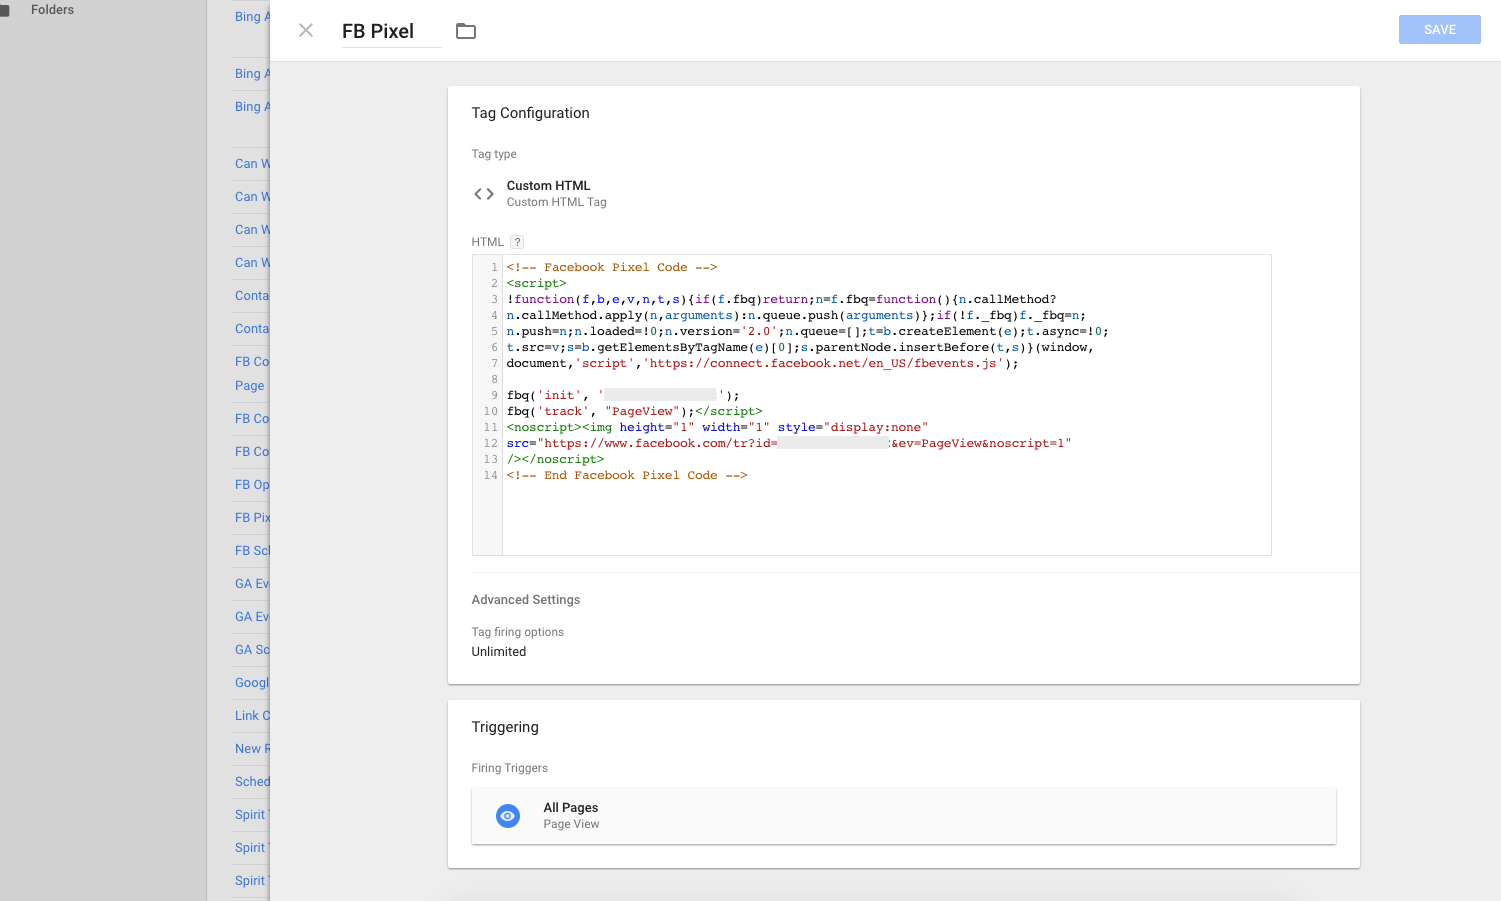
Under Triggering, choose to fire the tag on “All Pages.” You’ll specify pages for the conversion tracking portion later. Save the tag and publish your container and you’re done getting the pixel in place. You can verify your pixel installation using the Facebook Pixel Helper Chrome extension.
Setting Up Conversion Tracking
Once the code is in place, you can move to setting up specific conversion points. Think about the online goals you want to track after people visit your site. Here are a few possibilities:
- Submitting a service request form
- Scheduling an appointment
- Registering for a software demo
- Downloading an ebook
- Adding an item to a shopping cart
- Completing a purchase
Depending on how your site is setup, you can choose one of two methods for defining conversions. If you want to measure hits to unique page URLs (for instance, if forms go to unique thank you page URLs upon completion), you can track them using the Custom Conversions feature directly in the Facebook interface. If forms submit within a page without going to a different URL, you can use Events for tracking.
Using Custom Conversions
Within the Facebook Ads Manager top navigation section, go to Custom Conversions. From this screen, select “Create Custom Conversion.”
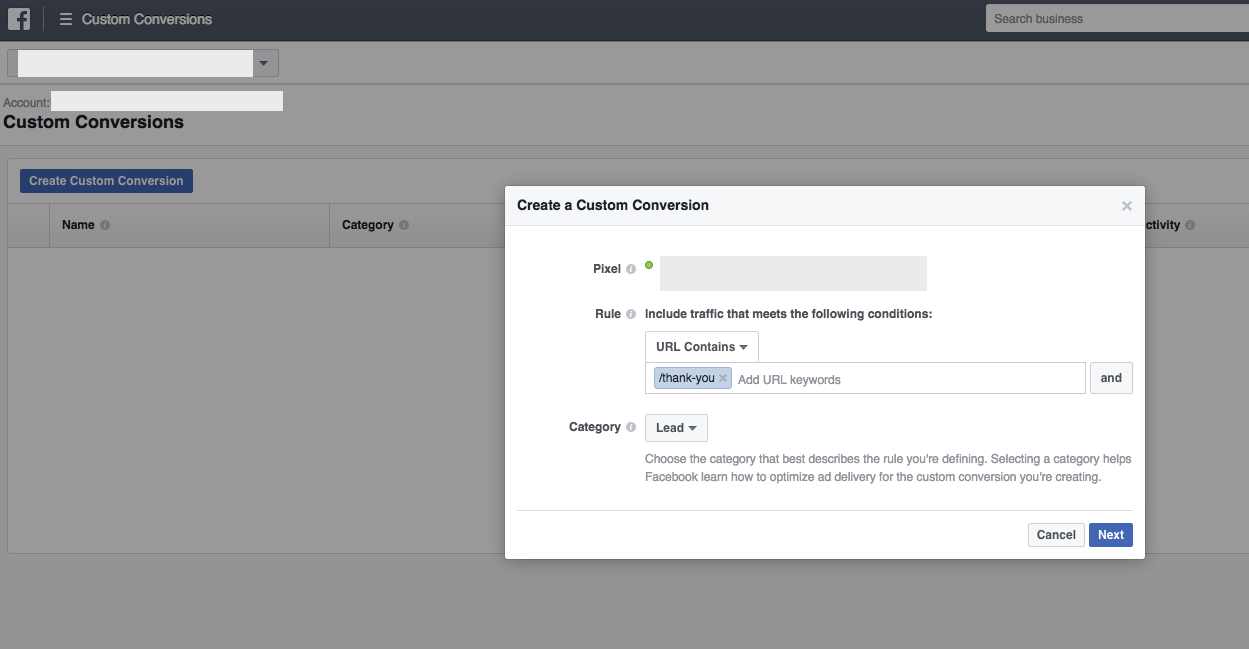
Now, insert the URL(s) that should count as a conversion. For example, if a form goes to example.com/thank-you upon submission, you can choose “URL Contains” and insert “/thank-you” in the text field.
Click “Next” for a prompt to enter a name for your Custom Conversion. Finally, you can set an optional value for your conversion if you can associate a dollar amount with it.
Using Events
If you need to track conversions outside of a hit to a Thank You page, like a form that submits without changing the page URL, use Custom Events. This setup entails firing an extra snippet of code upon completion of a conversion.
You can add events in 10 categories:
- Search
- View Content
- Add to Cart
- Add to Wishlist
- Initiate Checkout
- Add Payment Info
- Purchase
- Lead
- Complete Registration
- Custom Event
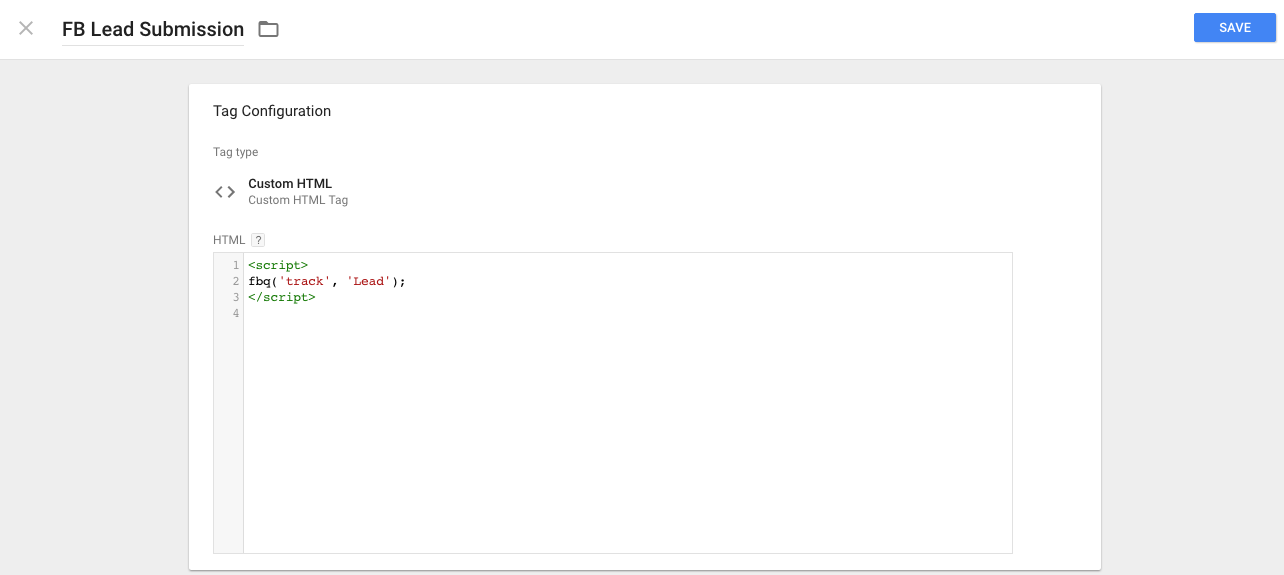
For more details, see this help article; in this example, we’ll cover adding a Lead event code via Google Tag Manager for a form submission.
First, create a new tag utilizing the Custom HTML type, as before. Paste in the Lead event tracking code supplied by Facebook.
The next step will vary based on your website’s setup, but we’ll cover an example of a common method to track form submissions. Create a new Trigger using the Form Submission type. Check the “Wait for Tags” and “Check Validation” boxes.
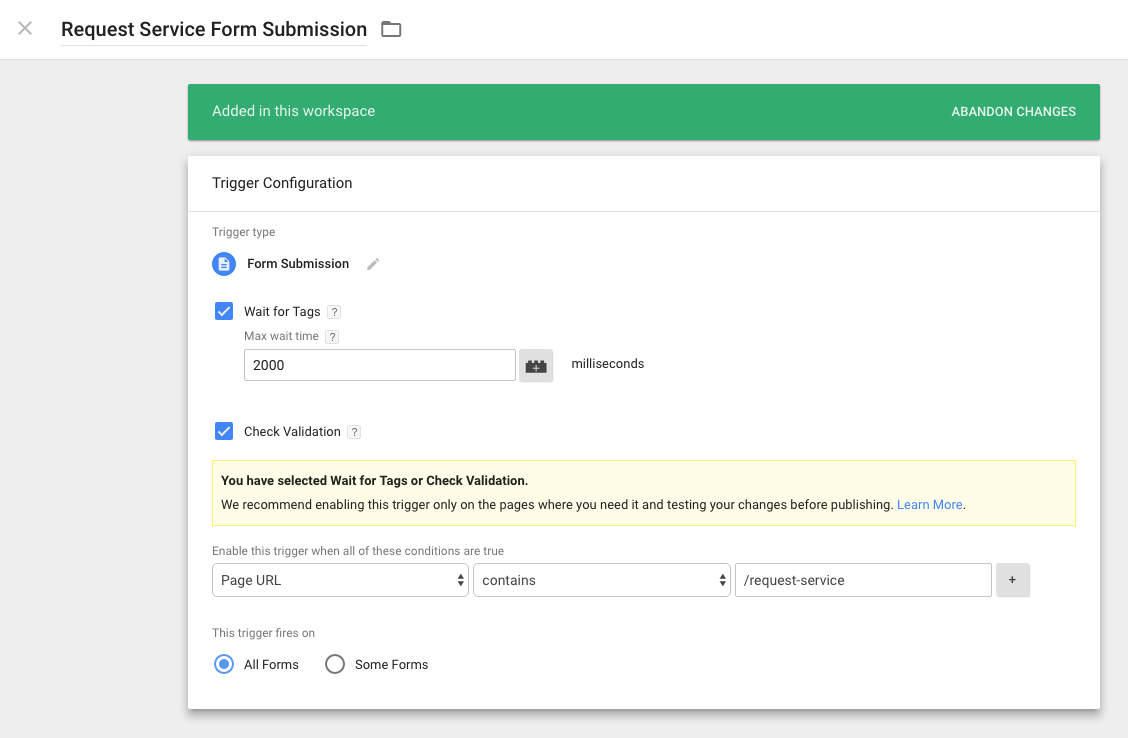
Next, specify the criteria for where you’ll enable the trigger. In this example, we want to fire the trigger only on the /request-service page, so we use that URL in the text box. We need to save the trigger to associate it with the tag and then save the tag. The last step is to publish the container to make the changes live on the website.
Correlating Conversions with Ads
Once you’ve set up conversion tracking, you’ll need to correlate conversions with any new ads you set up. When creating an ad, you’ll see an option to track conversions. Select “Track all conversions from my Facebook pixel” to automatically count any conversions that happen as a result of people viewing or clicking on your ad.
![]()
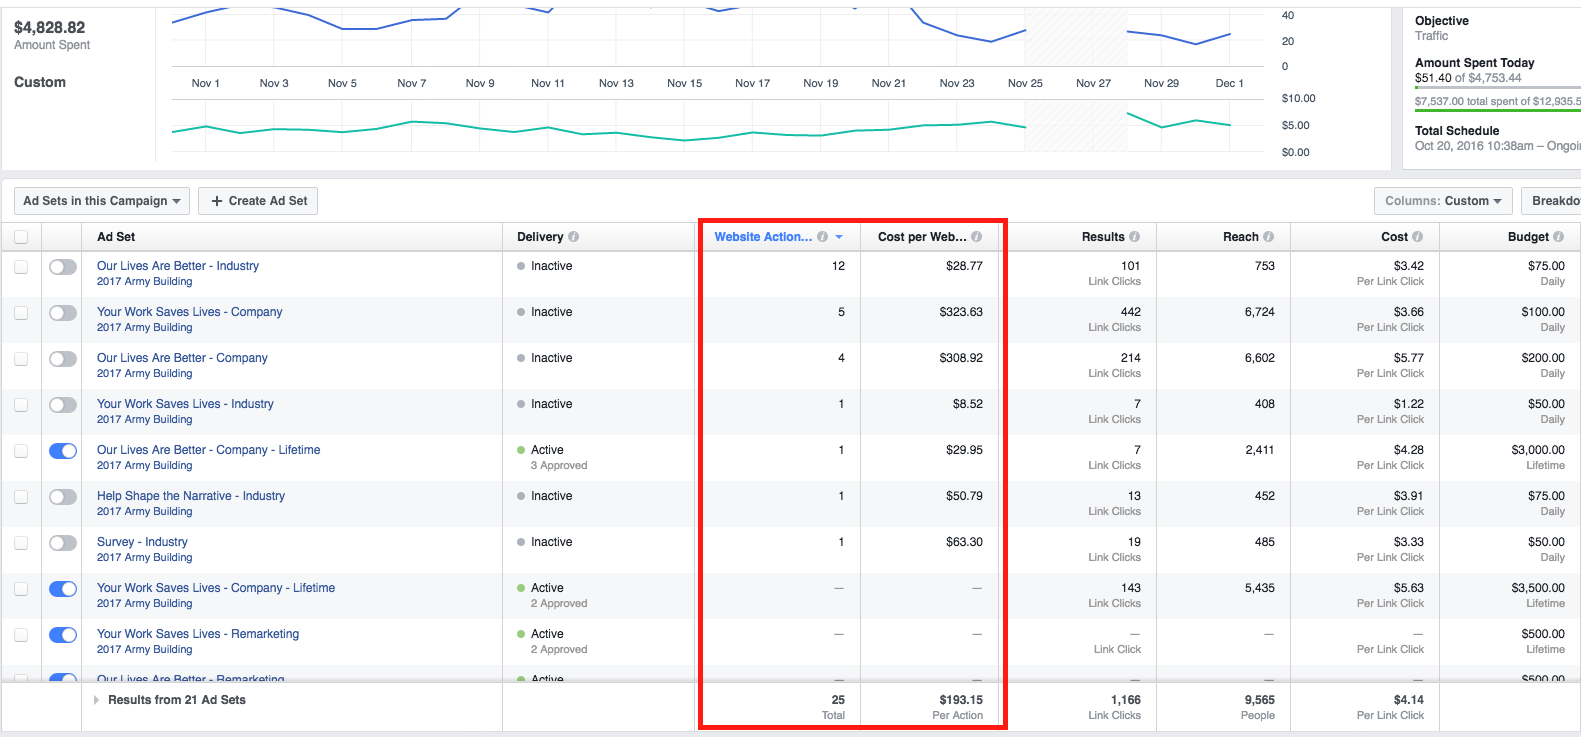
Viewing Conversion Results
Once your ad campaigns have begun running and you want to review performance, look at “Website Actions” to see conversion data. You may need to add this via the Columns dropdown if it’s not already in place. You can also add additional metrics like Cost Per Website Action, as well as metrics specific to each conversion point. Look at these on the campaign, ad set and ad level when evaluating performance.
Conclusion
The Facebook Pixel offers an accessible way to better track conversions from your Facebook ads. When combined with Google Tag Manager, you can easily get started setting up the pixel code and configuring conversions.
If you’re not yet tracking conversions in your Facebook ads, start today. Set up the pixel and watch the data come through!

